artificial hanging baskets, topiary balls, hedges and topiary trees
Artificial window boxes & troughs
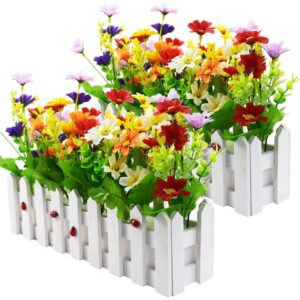
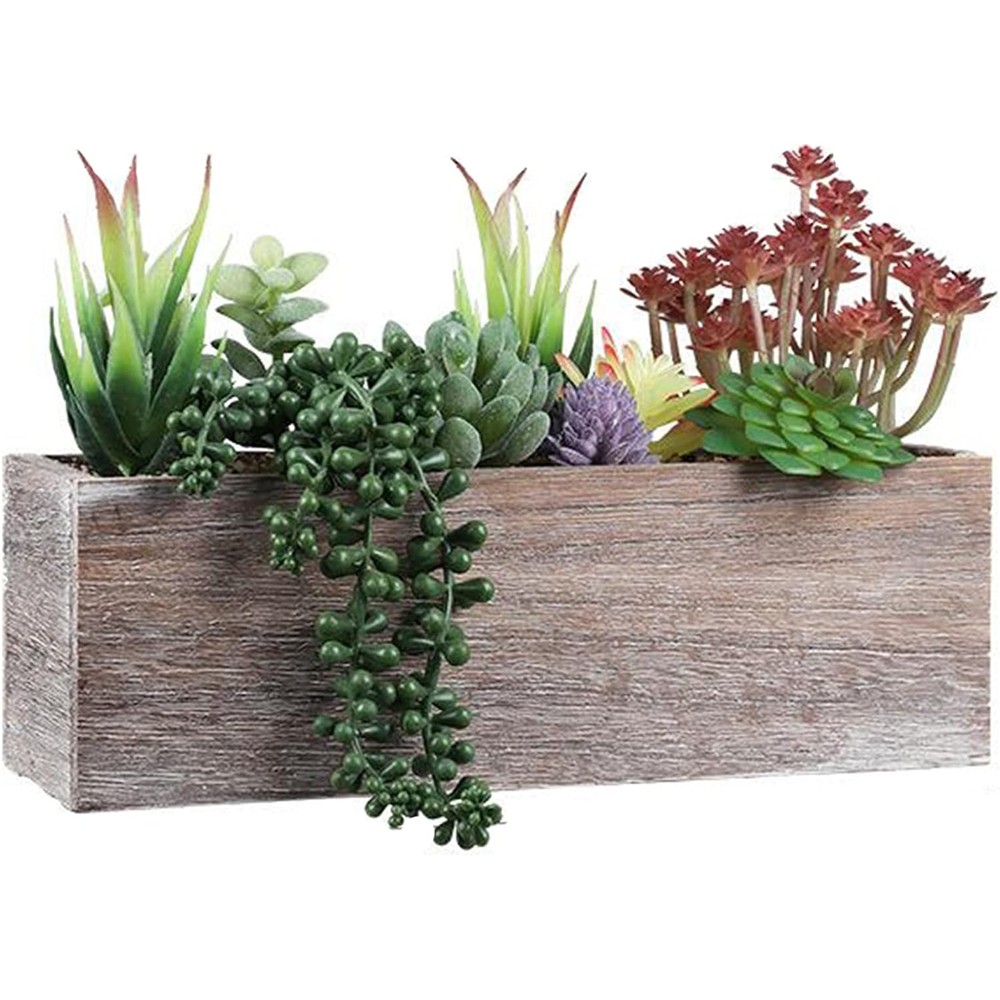
Brighten up windows, balconies and garden walls with artificial window boxes and troughs that stay looking good throughout the year. Our collection includes realistic artificial flowers and foliage for creating colourful displays without watering, deadheading or replacing seasonal plants.
Artificial window boxes and troughs: the complete buying guide
Last updated: September 2026
A window box is the smallest garden most of us will ever have, and the one that gets seen the most. It frames the window, lifts the whole frontage and, for anyone in a flat or a terrace with no front garden, it may be the only place to put flowers at all. It's also, if you plant it for real, the hardest container in the garden to keep alive. This guide covers how artificial window boxes and troughs work, how to choose between ready-made and build-your-own, how to get the size and box right, and, most importantly, how to fix one safely so it stays where you put it.
1. Why window boxes at all?
A window box does more for a house than almost anything else you can buy for under £100. It softens brickwork, draws the eye to the window, and signals that someone cares about the place. Estate agents talk about kerb appeal for a reason: a row of matching boxes across a frontage makes a terrace look like a street in a film. For flats, it's often the only outdoor planting possible. For shops, cafés and pubs, it's the cheapest way to make an entrance look welcoming.
Window boxes also work at eye level, which pots on the ground don't. You see them from inside the house as well as out, and they give you something green to look at from the kitchen sink or the sofa all year round.
2. Real vs artificial: cost, effort and weight
Here's the honest truth about real window boxes: they are the hardest container in the garden to keep looking good. Sun and wind dry a window box out roughly twice as fast as a pot at ground level, they hold a small volume of compost that exhausts itself in about twelve weeks, and they're usually somewhere awkward to reach with a watering can.
Real window box (60cm)
Quality artificial window box (60cm)
Cost of a year's colour
£90–£140 in plants, compost and feed, replanted four times a year
£0 after purchase
Purchase
£12–£80 for the box
£70–£190 ready-made, or £40–£120 to build your own
Watering
Daily in summer, twice daily in a heatwave, every 2–3 days in spring and autumn
None
Feeding
Slow-release at planting plus weekly liquid feed June to August
None
Weight when wet
15–25kg for a 60cm box
2–4kg including ballast
Drips on the wall and pavement
Every time you water
Only rain, and it drains straight through
Holiday cover
Essential in summer
Not needed
Looks its best
About six weeks each season
All year
The weight row matters more than it looks. A real window box on a first-floor sill is a heavy object above a pavement that gets heavier every time it rains. An artificial one weighs about the same as a bag of sugar and a book, which makes it far easier to fix securely and far less dangerous if a fixing ever fails.
Real boxes do have their pleasures: bees, scent, and watching things grow. If you have a ground-floor sill you can reach from the path and you enjoy the routine, go for it. For anything higher, anything you can't reach easily, or anywhere you want a finished look without the daily job, artificial is the sensible choice.
3. Window box or trough?
The two words get used interchangeably, but they describe slightly different jobs:
A window box sits on or just below a window sill. It's usually 60–100cm long, 15–20cm deep and 15–20cm high, and it's designed to be seen from the street below and from inside the room.
A trough is the same shape but lives elsewhere: on the ground against a wall, along the top of a low wall, on a balcony floor or rail, either side of a doorway, or as a divider on a patio. Troughs are often longer and deeper than window boxes because they don't have to fit a sill or be lifted to height.
A hedge trough is a trough planted with a low artificial boxwood hedge rather than flowers. Sold in heights from 25cm to over a metre, the low ones make smart contemporary window boxes and the tall ones make instant privacy screening for balconies and terraces.
Everything in this guide applies to all three. Where troughs at ground level differ (they need less fixing and more theft-proofing), we've said so.
4. Ready-made or build your own?
You can buy a window box already filled, or buy a trough and fill it yourself with artificial flower bushes and foliage. Both work well and the choice comes down to time, budget and how particular you are about the look.
Ready-made boxes arrive finished: typically a UV-stable plastic trough with ballast in the base, a block of dry foam cut to fit, stems glued in and a dressing of faux moss over the top. Unpack it, fix it, done. Expect to pay £70–£90 for a filled 60cm plastic trough and £90–£190 for a metre-long timber one. What you're paying for is the time and the glue, and the fact that a professional has arranged it. The compromise is that you get their design in their trough, brackets are never included, and if the trough doesn't suit your house you're stuck with it.
Building your own takes about half an hour and costs £12–£65 for a trough plus six to ten flowering bushes and some trailing foliage for a 60cm box. You choose a trough that suits your house, pick colours that suit your door, and you can change stems each season. It's also the only way to get a box that exactly fits an unusual sill. The method is in section 9, and our guide to stopping artificial stems wobbling in window boxes covers the details.
Our suggestion: if you have one box to fill and a standard sill, ready-made is quick and reliable. If you have several windows to match, a period house, or a sill that isn't a standard size, build your own; it will look better and cost less per box.
5. Getting the size right
The most common mistake is a box that's too small for the window. It looks perched rather than planted, and you'll notice every time you come home. A few rules:
Length. The box should run close to the full width of the window: either the same width as the frame, or about 5cm short at each end. A 60cm box suits a typical single sash or casement; 80cm or 100cm suits wider windows. For a very wide window, two shorter boxes side by side are much easier to lift, fix and remove than one long one.
Depth (front to back). 15–20cm gives room for a proper layered arrangement. Shallower than 13cm and there isn't enough foam to grip the stems, and the box tips easily once the flowers add height.
Height of the box. 15–20cm for the trough itself. The finished display, with flowers, will usually stand 35–50cm tall in total; check that doesn't block the view or the light from a small window.
Clearance for the window. If your window opens outwards (most modern uPVC casements do), the box needs to sit low enough to clear the open sash, usually 15–20cm below the sill on brackets. Sash and inward-opening windows only need the box a couple of centimetres below the frame.
Depth of the sill. If you plan to rest the box on the sill rather than brackets, measure the flat, usable depth. Many stone sills slope and are only 10–13cm deep, in which case brackets are the safer option.
Always check whether a listed size is the trough alone or the trough plus flowers.
6. Choosing the trough: materials compared
With artificial flowers the trough doesn't need to hold compost or drain roots, so the choice comes down to weight, looks and how long it lasts outdoors.
Material
Weight
Outdoor life
Best for
Watch out for
UV-stable plastic / resin
Very light
5–10 years
Upper floors, flats, anywhere you'll lift it down for storms
Cheap ones go brittle and chalky in sun; look for "UV-stable" and "frost-resistant"
Fibreglass (GRP) / fibreclay
Light
10–15 years
A stone or lead look without the weight; smart frontages and businesses
Gel-coat finishes scratch; more expensive
Galvanised zinc / powder-coated steel
Light to medium
10+ years
Modern and Victorian-style houses; very rigid
Cheap thin metal rusts at the seams; line it so ballast doesn't sit in water
Timber (tanalised or cedar)
Medium
3–5 years unlined, 8+ lined
Cottages, period houses, hedge troughs
Rots from the base if water sits in it; always line and drain
Terracotta / stone / concrete
Heavy
Decades (if frost-proof)
Ground-level troughs only
Too heavy for sills or brackets at height; terracotta cracks in frost
For anything above ground floor, choose plastic, fibreglass or metal. A good plastic or fibreclay trough looks like stone from the pavement, and the difference disappears entirely once it's full of flowers.
7. Flowers and foliage: what "UV-resistant" really means
Window boxes get more sun and more wind than almost any other position, so the flowers need to be genuinely outdoor-rated. There are two kinds of "UV-resistant":
UV-coated silk or polyester. The protection is a surface treatment that wears away over a season or so in direct sun. These look most realistic close up and are perfect for a recessed, north- or east-facing window, or one under an overhang.
UV-stabilised polyethylene (PE). The protection is mixed into the plastic and doesn't wear off, so colours last several seasons in full sun. Look for "PE", "polyethylene" or "UV-stabilised" in the description.
Flower colours fade before greens, and reds and purples fade before whites and yellows. For a south- or west-facing box in full sun, lean on foliage, whites, creams and greens for the long-lasting structure and treat bright colour as something you'll refresh every couple of seasons. A UV-protection spray, reapplied each spring, slows fading further. Anything sold for indoor use only is not UV-treated and won't last a summer outside.
8. Drainage (yes, even for artificial)
People assume artificial flowers mean no drainage holes. The opposite is true. A sealed box outdoors becomes a bucket every time it rains: the water rots timber, rusts steel from the inside, breeds algae in the foam and, on a box at height, adds several kilos of unplanned weight. Every outdoor trough needs at least two holes in the base, about 12mm across, at the lowest point. If yours has none, drill them; most plastic troughs have moulded notches showing where.
Two related points. Sit the box a centimetre or two off the wall so water doesn't get trapped behind it and stain the brickwork. And if the box overhangs a pavement, rainwater dripping through it will land on passers-by and can leave a green streak on the paving below; a shallow drip tray under a sill-mounted box solves both, as long as you empty it after heavy rain.
9. Inside the box: ballast, foam and finish
Whether you buy ready-made or build your own, a good artificial window box has three layers doing three different jobs. Understanding them is the difference between a box that lasts and one that rattles, tips and sheds stems.
Ballast at the bottom. Artificial displays are top-heavy and light, so they need weight low down. Part-fill a plastic bag with sand or gravel, seal it and lay it in the base. The bag keeps the ballast contained, stops it washing out of the drainage holes, and makes the box easy to empty later. The more exposed the position, the more ballast.
A holding layer on top. This grips the stems. Use high-density dry floral foam, cut snugly to fit the trough and pressed down onto the ballast. Do not use the green "wet" oasis sold for fresh flowers: it's designed to soak up water, and outdoors it drinks rain, softens and crumbles within weeks. For tall stems or windy spots, lay a piece of chicken wire or a wire grid across the foam and pass each stem through a gap before pushing it into the foam; the wire holds the stem at the surface while the foam holds it below. A dab of waterproof glue where heavy stems enter the foam adds insurance.
A finish on top. Hide the mechanics with faux moss, bark chips, slate or small pebbles. This one step is what makes an artificial box look planted rather than placed, and on a ready-made box it's a good sign the maker has thought about the details.
For a 60cm box you'll need six to ten flowering bushes plus trailing foliage for the ends and front edge. A liner (a plastic bag or a cheap plastic trough inside a decorative one) keeps the whole insert tidy and lets you lift it out in one piece when you want to change it.
10. Fixing it safely: sills, brackets and walls
This is the section to take seriously. A window box that comes off a ground-floor sill is a nuisance; one that comes off a second-floor sill onto a pavement is a serious accident. A few facts to know before you start: window frames, especially uPVC, are not structural and shouldn't carry the load; render and mortar won't hold a fixing on their own; and above ground floor, a box should never simply rest on the sill.
Resting on a sill (ground floor, or a deep sill above).
Most stone and concrete sills slope outwards to shed water. Level the box with a pair of wedges, a batten, or a trough with adjustable feet, so it sits flat and doesn't creep forward.
Restrain it. Fix a small hook or eye into the masonry at each end of the window (not the frame) and run a strap, chain or heavy wire across the front of the box, or fix an L-bracket at each end so the box can't slide outwards.
A traditional method for a wide sill: fix a treated timber board across the front of the sill, screwed into the masonry either side of the window with a small gap underneath for water to drain. The boxes sit behind it and can't fall.
On brackets below the sill (the standard method, and the only one for outward-opening windows).
Choose powder-coated or galvanised steel brackets rated for well above the box's weight. Two brackets for boxes up to 80cm, three for longer.
Fix into solid brick or stone with proper masonry plugs and screws, or into a timber stud on a timber-framed wall. Never into render, mortar joints or the window frame.
Use a spirit level across both brackets before you drill; a box that sits crooked shows from the street.
Fix the box to the brackets, with a screw up through the bracket into the base, a strap, or cable ties through the drainage notches. A box just sitting on brackets can lift in a gust.
Set the brackets so the box sits 2–5cm below the sill for sash windows, or low enough to clear an outward-opening casement.
Seal around the screw heads with exterior sealant on painted or porous walls.
On a balcony rail. Use purpose-made rail brackets or a saddle trough that straddles the rail, check the rail itself is sound, and position the box so that if anything ever worked loose it would fall onto your own balcony rather than the street.
Whatever method you use, give everything a firm tug once or twice a year and after any storm.
11. Renting or leasehold? Read this first
Many leases and tenancy agreements restrict what you can fix to the outside of the building or place outside the windows, and landlords do enforce them; tribunals have ruled against leaseholders for putting up window boxes without consent. Read your lease, and if in doubt ask in writing. Most landlords will say yes to a lightweight, properly secured artificial box, particularly if you point out it weighs a fraction of a real one and never drips.
If you can't drill, there are no-drill options, with limits. Clamp-on brackets grip the edge of a window frame; hook-over hangers sit over a projecting sill or trim; leverage brackets rest a foot on a deep sill and brace against the wall. All are suitable only for light plastic boxes with modest ballast, on ground or first floor. Pad the contact points to protect the stonework, and don't rely on adhesive fixings alone above head height.
12. Wind and upper floors
Wind is stronger the higher you go, and a light box with a tall arrangement is a sail. Upper-floor boxes need more ballast in the base, tightly packed foam, a wire grid over the foam, and ideally a dab of glue or a discreet cable tie on the heaviest stems. Keep the arrangement a little lower and denser than you would at ground level; a compact, full box moves less than a tall, airy one.
Remember that a box over a public pavement is legally a projection from your building. Under the Highways Act, a projection that's insecurely fixed is deemed a danger to people using the street and the council can order it removed. That's not a reason to avoid window boxes; it's a reason to fix them properly. Our guide to faux window box ideas for upper-floor flats goes through the whole process for anyone above ground level.
13. Styling: how to make it look planted
Gardeners plant window boxes to a formula called thriller, filler, spiller, and it works just as well with artificial stems: one or two taller "thriller" stems in the centre for height, "filler" bushes around them for body, and "spiller" foliage such as ivy or fern trailing over the front edge and ends. For a 60cm box that's roughly one thriller, four to six fillers and two or three spillers.
A few habits that separate a convincing box from an obvious one:
Fill it generously. A sparse box looks artificial; a full, slightly overflowing one looks alive.
Break the symmetry slightly. Vary the heights, lean a few stems outwards, let one trailing piece hang lower than the others. Real plants don't grow in rows. Our post on how to stop artificial window boxes looking too neat is all about this.
Bend and fluff every stem. Wired stems arrive flat from the box; five minutes of shaping makes more difference than any other single thing.
Match across windows. If you're dressing two or more windows on the same frontage, use the same trough, the same stems and the same arrangement on each. Repetition is what makes a terrace look designed.
Think about the view from inside. The back of the box faces you all day, so put something worth looking at there too.
Suit the house. Geraniums, ivy and a touch of white suit Georgian and Victorian frontages; a low boxwood hedge trough or a single-species planting suits a modern one. See our guide to styling window boxes for Georgian or Victorian homes.
14. Changing it with the seasons
One of the quiet advantages of a build-your-own box is that you can change a handful of stems and get a different box for a few pounds. Keep the foliage, ballast and foam in place and swap the flowers: pansies and daffodils in spring, geraniums and lobelia for summer, heather and rust tones for autumn, then pine, berries and a few battery lights for December. Two spare sets of stems in a box in the cupboard means a fresh look four times a year for the cost of one ready-made box.
15. Storms, winter and cleaning
No window box is storm-proof. When a named storm is forecast, lift boxes down if you can reach them safely; if you can't, this is your reminder to check the fixings when the weather passes. Good outdoor-rated boxes can stay out all winter, but they last longer if you bring them into a dry shed or garage out of direct sun. Let them dry fully first, and never store a wet box in a bag.
Clean once or twice a year: a dry shake, a soft brush or cool hairdryer for pollen and dust, a damp cloth with a drop of washing-up liquid for road film, and a gentle hose rinse from the top down. Never spray water into the foam, and avoid hot water, solvents and pressure washers. Dry, fluff and rehang. Full instructions are in how to clean outdoor artificial flowers.
16. Window boxes for businesses
Window boxes are the classic way to make a shop, café, pub or salon look welcoming, and artificial ones remove the two problems that usually kill the idea: nobody has time to water, and nobody wants a box of dead petunias by August. A few extras for commercial premises:
Fixings and inspection. Use the bracket method, fix the box to the brackets, and put a twice-yearly check in the diary. Councils that licence projections over the highway typically require a structural inspection every two years and public liability insurance; treat that as good practice even where no licence is needed.
Heights over the pavement. Anything projecting over a public footway should leave clear headroom (councils in England generally work to 2.25m; in Scotland lower projections are an offence). Ground-floor window boxes on brackets usually sit below head height, so keep them flush to the wall and no deeper than the sill.
Listed buildings and conservation areas. Fixed brackets on a listed frontage may need consent. Sill-mounted boxes with restraint straps usually don't.
Drips. Real boxes drip onto the pavement every time they're watered and leave a slippery green patch; artificial ones don't, which is a real advantage on a busy entrance.
Indoors. Troughs used inside licensed premises may need fire-retardant-rated foliage to satisfy your fire risk assessment. Ask before you buy.
17. How long will it last?
Realistically, a quality box with UV-stabilised PE foliage in a sunny UK position should look good for three to five seasons with an annual clean and a winter rest indoors. UV-coated silk in full sun may fade noticeably within a season, though under an overhang or on a north-facing wall it lasts far longer. The trough itself will outlast the flowers several times over, which is another argument for a box you can refill rather than replace: when the flowers tire, swap the stems for a fraction of the cost and keep the trough, brackets and ballast.
18. Buyer's checklist
Before you click "buy":
Have you measured the window width, the usable sill depth, and whether the window opens outwards?
Is the trough 15–20cm deep and front-to-back, and is the stated size trough-only or including flowers?
Is the trough material right for the height: plastic, fibreglass or metal above ground floor?
Is the foliage material named (PE / UV-stabilised), or does it only say "UV-resistant"?
Does the box have drainage holes, or can you drill them?
Ready-made or build your own? If ready-made, does it have ballast, dry foam and a moss finish? If DIY, do you have high-density dry foam (not wet oasis), a bag of sand and six to ten bushes?
Do you have brackets rated for the load and fixings for solid masonry, or a restraint plan for a sill-mounted box?
If you rent or hold a lease, have you checked the rules?
Are you matching more than one window? Have you ordered identical troughs and stems for each?
Do you have a plan for storms and somewhere dry to store the box in winter?
FAQs
Do artificial window boxes need drainage holes?
Yes. Without them an outdoor box fills with rainwater, which rots timber, rusts metal, breeds algae in the foam and adds unwanted weight to a box at height. Every outdoor trough should have at least two 12mm holes at the lowest point. If yours has none, drill them; most plastic troughs have moulded notches marking the spot.
How do I fix a window box to a sloping stone sill?
Level the box with wedges, a batten or a trough with adjustable feet so it sits flat and can't creep forward, then restrain it with a strap or chain across the front fixed to hooks in the masonry either side of the window, or an L-bracket at each end. Above ground floor, use brackets fixed into the wall below the sill instead of resting the box on the sill.
Can I fix a window box to a uPVC window frame?
It's best not to. uPVC frames aren't structural and screwing into them can void guarantees and let water in. Fix brackets into the brick or stone below the sill instead. If your uPVC window opens outwards, set the brackets 15 - 20cm below the sill so the box clears the open sash.
What size window box do I need?
Run the box close to the full width of the window, either matching the frame or about 5cm short at each end. A 60cm box suits most single windows; use 80 - 100cm for wider ones or two shorter boxes side by side. Choose a trough 15 - 20cm deep front to back so there's room to anchor stems properly.
What should I put in the bottom of an artificial window box?
Three layers: a sealed bag of sand or gravel for ballast, a block of high-density dry floral foam cut to fit for holding the stems, and a dressing of faux moss, bark or slate over the top to hide the mechanics. Don't use the green wet oasis sold for fresh flowers; it soaks up rain and crumbles outdoors.
How many artificial flowers do I need for a 60cm window box?
Six to ten flowering bushes plus trailing foliage for the ends and front edge. A good formula is one or two taller stems in the centre, four to six bushy fillers around them and two or three trailing pieces spilling over the front.
Can I have a window box if I rent or own a leasehold flat?
Often, but check first. Many leases and tenancies restrict fixing things to the outside of the building or placing items outside windows, and landlords can and do enforce them. Ask in writing; a lightweight, properly secured artificial box that never drips is an easy yes for most landlords. No-drill clamp or hook-over brackets suit light boxes on lower floors.
Are artificial window boxes safe on upper floors?
Yes, provided they're fixed properly. A filled artificial box weighs 2–4kg compared with 15–25kg for a real one when wet, so it's far easier to secure. Use brackets fixed into masonry, fix the box to the brackets, add more ballast for wind, and never simply rest a box on a sill above ground floor.
Do artificial window boxes fade in the sun?
All artificial flowers fade eventually, but the rate depends on the material. UV-stabilised polyethylene (PE) holds its colour for three to five seasons in full sun; UV-coated silk can fade within a season on a south-facing sill but lasts much longer under an overhang or on a north-facing wall. Greens, whites and creams outlast reds and purples.
Is an artificial window box cheaper than a real one?
Over more than one season, yes. Keeping a real 60cm box in colour all year costs £90–£140 in plants, compost and feed, plus daily watering in summer. A ready-made artificial box is £70 - £190 one-off, or £40 - £120 to build yourself, with no running costs.
We use cookies on our website to give you the most relevant experience by remembering your preferences and repeat visits. By clicking “Accept All”, you consent to the use of ALL the cookies. However, you may visit "Cookie Settings" to provide a controlled consent. View privacy & cookies policy.
This website uses cookies to improve your experience while you navigate through the website. Out of these, the cookies that are categorized as necessary are stored on your browser as they are essential for the working of basic functionalities of the website. We also use third-party cookies that help us analyze and understand how you use this website. These cookies will be stored in your browser only with your consent. You also have the option to opt-out of these cookies. But opting out of some of these cookies may affect your browsing experience.
Necessary cookies are absolutely essential for the website to function properly. These cookies ensure basic functionalities and security features of the website, anonymously.
Cookie
Duration
Description
cookielawinfo-checkbox-advertisement
1 year
The cookie is set by GDPR cookie consent to record the user consent for the cookies in the category "Advertisement".
cookielawinfo-checkbox-analytics
11 months
This cookie is set by GDPR Cookie Consent plugin. The cookie is used to store the user consent for the cookies in the category "Analytics".
cookielawinfo-checkbox-functional
11 months
The cookie is set by GDPR cookie consent to record the user consent for the cookies in the category "Functional".
cookielawinfo-checkbox-necessary
11 months
This cookie is set by GDPR Cookie Consent plugin. The cookies is used to store the user consent for the cookies in the category "Necessary".
cookielawinfo-checkbox-others
11 months
This cookie is set by GDPR Cookie Consent plugin. The cookie is used to store the user consent for the cookies in the category "Other.
cookielawinfo-checkbox-performance
11 months
This cookie is set by GDPR Cookie Consent plugin. The cookie is used to store the user consent for the cookies in the category "Performance".
viewed_cookie_policy
11 months
The cookie is set by the GDPR Cookie Consent plugin and is used to store whether or not user has consented to the use of cookies. It does not store any personal data.
Functional cookies help to perform certain functionalities like sharing the content of the website on social media platforms, collect feedbacks, and other third-party features.
Cookie
Duration
Description
na_id
1 year 1 month
This cookie is set by Addthis.com to enable sharing of links on social media platforms like Facebook and Twitter
na_rn
1 month
This cookie is used to recognize the visitor upon re-entry. This cookie allows to collect information on user behaviour and allows sharing function provided by Addthis.com
na_sc_e
1 month
This cookie is used to recognize the visitor upon re-entry. This cookie allows to collect information on user behaviour and allows sharing function provided by Addthis.com
na_sr
1 month
This cookie is set by Addthis.com. This cookie is used for sharing of links on social media platforms.
na_srp
1 minute
This cookie is used to recognize the visitor upon re-entry. This cookie allows to collect information on user behaviour and allows sharing function provided by Addthis.com
na_tc
1 year 1 month
This cookie is set by the provider Addthis. This cookie is used for social media sharing tracking service.
ouid
1 year 1 month
The cookie is set by Addthis which enables the content of the website to be shared across different networking and social sharing websites.
Performance cookies are used to understand and analyze the key performance indexes of the website which helps in delivering a better user experience for the visitors.
Cookie
Duration
Description
_gat
1 minute
This cookies is installed by Google Universal Analytics to throttle the request rate to limit the colllection of data on high traffic sites.
d
3 months
This cookie tracks anonymous information on how visitors use the website.
YSC
session
This cookies is set by Youtube and is used to track the views of embedded videos.
Analytical cookies are used to understand how visitors interact with the website. These cookies help provide information on metrics the number of visitors, bounce rate, traffic source, etc.
Cookie
Duration
Description
__gads
1 year 24 days
This cookie is set by Google and stored under the name dounleclick.com. This cookie is used to track how many times users see a particular advert which helps in measuring the success of the campaign and calculate the revenue generated by the campaign. These cookies can only be read from the domain that it is set on so it will not track any data while browsing through another sites.
_ga
2 years
This cookie is installed by Google Analytics. The cookie is used to calculate visitor, session, campaign data and keep track of site usage for the site's analytics report. The cookies store information anonymously and assign a randomly generated number to identify unique visitors.
_gid
1 day
This cookie is installed by Google Analytics. The cookie is used to store information of how visitors use a website and helps in creating an analytics report of how the website is doing. The data collected including the number visitors, the source where they have come from, and the pages visted in an anonymous form.
Advertisement cookies are used to provide visitors with relevant ads and marketing campaigns. These cookies track visitors across websites and collect information to provide customized ads.
Cookie
Duration
Description
DSID
1 hour
This cookie is setup by doubleclick.net. This cookie is used by Google to make advertising more engaging to users and are stored under doubleclick.net. It contains an encrypted unique ID.
IDE
1 year 24 days
Used by Google DoubleClick and stores information about how the user uses the website and any other advertisement before visiting the website. This is used to present users with ads that are relevant to them according to the user profile.
test_cookie
15 minutes
This cookie is set by doubleclick.net. The purpose of the cookie is to determine if the user's browser supports cookies.
uid
1 year 1 month
This cookie is used to measure the number and behavior of the visitors to the website anonymously. The data includes the number of visits, average duration of the visit on the website, pages visited, etc. for the purpose of better understanding user preferences for targeted advertisments.
uuid
3 months
To optimize ad relevance by collecting visitor data from multiple websites such as what pages have been loaded.
VISITOR_INFO1_LIVE
5 months 27 days
This cookie is set by Youtube. Used to track the information of the embedded YouTube videos on a website.
 A warm welcome from The Artificial Flowers Company. We offer artificial flower arrangements, silk flowers, hanging baskets, topiary balls, topiary plants and much more - we hope you find what you're looking for!
