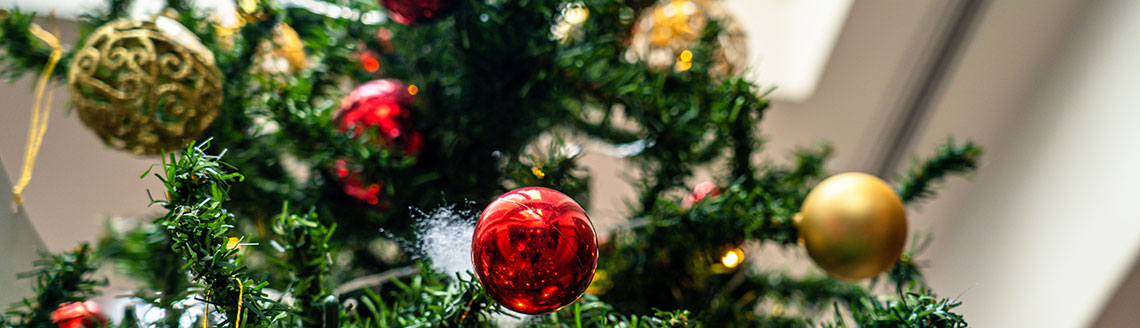
A artificial Christmas tree with visible gaps, a garland that looks like a thin green rope, and a vase of flowers that does not feel particularly Christmassy need different solutions. Adding more baubles to all three is not necessarily the answer.
Before adding decorations, decide what you are trying to change. Does the foliage need more depth? Is the supporting frame showing? Does the arrangement look too stiff? Or is it perfectly attractive already, but needs a seasonal change?
Here are some practical ways to tackle those problems, from filling a sparse tree to turning an everyday flower arrangement into a Christmas centrepiece.
First, get to know foliage picks and sprays
Picks and sprays are separate decorative stems that you insert into an arrangement. They might carry plain evergreen foliage, berries, pinecones or flowers; others are deliberately decorative, with glitter, beads or metallic finishes. Despite the name, a foliage spray is a stem, not something in an aerosol can. They can be used in trees, wreaths, garlands and flower arrangements.
It helps to think of them as doing two different jobs:
| What needs changing? | What to try |
|---|---|
| The greenery is thin or its construction is showing | Branched evergreen sprays that add actual leafy volume |
| The outline is stiff and repetitive | A few looser, finer sprays extending beyond the existing foliage |
| The display needs to feel more Christmassy | Berry, holly, pinecone or floral picks added to the existing greenery |
A glittery twig may be an attractive finishing touch, but it will not conceal a bare wreath frame in the same way as a leafy branch.
When comparing stems, look at the size of the leafy or decorative portion, not just the overall length. A long bare stem is useful for reaching into a tree or tall vase, but it does not contribute much visible fullness.
Christmas trees: fill the right gaps
Shape the inside before worrying about the outside
Start with the lowest section and work upwards, shaping each section before the next one makes it harder to reach. Within each branch, begin near the trunk rather than at the visible tips.
Separate the inner shoots and angle them into different spaces. Then spread the middle offshoots and finish with the outer tips. Simply spreading the ends leaves the interior compressed, which is why a tree can look wide enough but still have obvious holes through to the pole.
For a tall tree with a removable top section, shape that section while it is still within comfortable reach, before fitting it in place.
Use greenery to repair the shape, rather than hanging something over every hole
Where shaping leaves an unwanted gap, try an artificial pine or fir spray in a compatible green. Evergreen sprays – or a little artificial Christmas garland worked further inside the tree – can add foliage where the existing branches do not provide enough coverage.
Spread the spray before inserting it. Push the bare stem far enough into the tree that the decorative part emerges among the branches, rather than looking as though a miniature bouquet has been balanced on the surface. Where the tree’s construction allows, a small flexible inner branch can hold the stem in place; otherwise, use a suitable removable tie around a structural branch, clear of any lighting cable.
For a discreet repair, try following the direction of the neighbouring foliage. A branch projecting at an entirely different angle will draw attention to the very spot you were trying to disguise.
Do not confuse fullness with removing every space
Stand where you will normally see the tree – from the sofa or doorway – and decide which gaps actually bother you.
An exposed connector is worth concealing. A space between two attractive branches may be useful for displaying a favourite ornament. Filling every opening can make it harder to see individual decorations and lose the outline you liked in the first place.
Work on one problem area, step back, and reassess before adding more. You are improving this particular tree, not trying to meet a fixed number of sprays per foot.
Wreaths: add depth, not just more things around the edge
Lift the foliage away from the frame
An artificial Christmas wreath needs shaping through its depth, not merely widening into a bigger circle. Support the frame with one hand and work through the layers, lifting the wired tips and following the direction of the existing foliage. This creates overlapping greenery rather than a flat ring of branches.
Try looking at the wreath from the side as well as the front. When all the greenery sits in one plane, extra decorations can make it heavier without making it look fuller.
Make a removable Christmas section
You do not have to decorate the entire circumference. Picks can be added to existing greenery and removed again when you want a different seasonal look.
For example, try a small cluster of fir, berries and one flower towards the lower left of a plain wreath. Arrange the pieces together before attaching them: longer foliage extending along the curve, shorter pieces covering the bare stems, and the flower sitting where the stems meet.
Treat it as a small, removable arrangement. Secure it to the wreath’s frame with suitable floristry wire or ties, keeping the ends tucked safely away. This lets you adjust its position and remove the Christmas additions without dismantling the base.
The same approach could turn a plain eucalyptus wreath into a festive display without permanently covering its original foliage.
Finish it while it is hanging
Once the wreath is on its intended hook, check whether the added weight has pulled it to one side. Then check the view from a few steps away and open the door fully.
That last check matters: a decoration can look well positioned with the door shut but catch a handle, wall or door surround when it moves. Keep any projecting stems and wire ends away from the door surface.
For an outdoor wreath, check the suitability of the additions as well as the base. Outdoor greenery does not make an indoor-only floral pick suitable for rain. Manufacturers distinguish outdoor-safe greenery from picks intended only for indoor use.
Garlands: use a fuller base and a more interesting top layer
Combine two different garlands rather than replacing the first
A useful way to improve a basic garland is to keep it as the backing and add a second, more detailed garland over the visible side. One provides bulk; the other provides the foliage you notice.
Lay them together and attach their central spines at intervals, then arrange the foliage so the two pieces mingle. Use ties or floristry wire to secure the two layers together.
Try this before twisting the two tightly together. Keeping a distinct backing and facing layer gives you more control over which foliage shows and where it falls.
It also means an older garland does not have to look convincing on its own to remain useful.
Shape it for the position it will occupy
Find the garland’s central supporting spine and keep it towards the back or underside of the display. Lift the foliage away from it, following the direction in which the sprigs are attached, rather than pulling everything out at right angles.
On a mantel, try directing some foliage across the top and some over the front edge. That gives you a shaped display rather than a cylindrical garland simply sitting on a shelf.
Where a join or bare end remains visible, lay a matching foliage stem along it and secure it discreetly. Covering an exposed end with a compatible stem can disguise the join.
Measure the route, not just the furniture
Before deciding where the garland will start and finish, lay a piece of string along the exact route you want it to follow. Include dips, end drops and any overlap where two pieces will meet. Then measure the string.
This is especially useful when adapting a garland you already own: you can change the depth of the drape before finding yourself short at the far end.
Once you have doubled the greenery or added decorations, reassess the fixings for the finished weight. Keep batteries and controls accessible, and never use a lighting cable as the hanging support.
Christmas flowers: change the surroundings before replacing the blooms
Give an existing bouquet a winter setting
An existing arrangement does not necessarily need an entirely new set of blooms to make them artificial Christmas flowers. Try adding seasonal foliage and berry stems to existing arrangements, including berries with eucalyptus.
For an ivory rose arrangement, try keeping the roses and eucalyptus but adding fir around the lower part and a few red berry stems higher up. For a darker display, try deep pink flowers with dark berries and branching twigs.
First remove anything that makes the arrangement feel too summery to you. Otherwise, each seasonal addition has to compete with everything already there, and the vase can become crowded before its character changes.
Let the berries show beyond the flowers
Instead of burying berry picks between large flower heads, try letting some emerge above and around the edges. Leave some berry stems longer than the flowers so they remain visible.
Use that extra length selectively. A few branching stems can change the outline without requiring a large number of additional flowers.
Also inspect the area immediately above the vase rim. When the flowers sit on a bundle of exposed, upright stems, try lowering some heads and adding shorter foliage around the neck. The missing piece may be greenery at the base, not another large bloom at the top.
Bend before cutting
With an opaque vase, bend suitable wired stems to adjust their height before committing to a permanent cut. This also preserves the option of using them in a taller arrangement later. In clear glass, those bends will be visible, so trimming may give a neater result.
Set the approximate heights first, then refine them in the vase. Resist making every stem the same length simply because they arrived that way.
Only bend parts designed to be shaped, and use suitable wire cutters—not household scissors—where wire-containing stems need shortening.
Poinsettias: shape them as plants, not flat red flowers
Look at what the red parts actually are
On a real poinsettia, the showy red, pink or cream parts are bracts, rather than petals. The actual flowers are the small yellow structures at the tops of the stems.
Use that as a reference when arranging an artificial version. Where the bracts and leaves are wired, try opening them into overlapping layers rather than flattening every head into the same star shape.
Let some heads face slightly differently and keep the green foliage visible below. Do not force unwired fabric, glued joints or rigid plastic into a new position.
Check the height of the plant inside its decorative pot
An attractive outer pot can make a small artificial poinsettia look more finished, but a deep container may swallow the lower foliage.
Before adding more flowers to compensate, check the position of the original pot. Try raising it on a firm, stable support inside the decorative container, so the foliage sits comfortably above the rim while the original pot remains concealed.
This is a useful adjustment to test before deciding the plant itself is too small.
Use a poinsettia as a focal point, not necessarily the whole arrangement
A suggested alternative to a large potted display is one poinsettia pick among fir, eucalyptus and berries in a low container. Let the greenery establish the shape and the poinsettia provide a clear focal point.
The same idea can work on a wreath: one well-placed flower, with its stem concealed, rather than a red flower repeated at equal intervals all the way around. Try the position temporarily before securing it.
Table centrepieces and sideboard arrangements: build for the view
Set the table before setting the flowers
Put out the plates, glasses and serving dishes before deciding how much room the centrepiece can occupy.
Then sit down. Check whether you can comfortably see the person opposite and reach what you need without brushing through foliage. This is more useful than judging the arrangement while standing above an otherwise empty table.
For a dining table, try extending the display lengthways rather than making it taller. Keep projecting berries and branches away from glasses, food and the places where people will put their hands.
A sideboard arrangement does not need the same shape
For a display against a wall, try concentrating the detail across the front and visible sides, with taller stems towards the back. You do not need to spend the same number of decorative stems on a side nobody sees.
A dining-table arrangement is different: walk around it and check every seat’s view. A flower facing you may reveal a conspicuous plastic backing to someone opposite.
Check mirrors too. A sideboard display in front of a mirror may need more attention at the back than one against a plain wall.
Give the stems proper support
In a shallow container, stems need something to hold their positions; otherwise, each new addition can push the previous ones aside.
For an artificial-only arrangement, dry floral foam is one option. It is a product designed for artificial and dried flowers, rather than ordinary wet floral foam simply left unsoaked. Dry floral foam is denser, with a structure intended to support these stems.
Fit and secure the support in the container before arranging, then use lower foliage to conceal it. Check that neither the support nor bare stems are visible from a seated position.
Make the display movable
For a table that will be used for Christmas dinner, consider several small arrangements rather than one long, interwoven piece. They can sit together for the display, then move apart—or onto a sideboard—when serving dishes arrive.
Another simple arrangement to try is a wreath laid flat on a protective tray, with a flameless candle in the middle. Add a removable floral cluster to one side rather than rebuilding the wreath as a permanent centrepiece.
Use flameless LED candles amongst the foliage, not real candles nestled into the greenery. London Fire Brigade recommends flameless candles as a safer alternative and advises keeping decorations away from naked flames. (London Fire Brigade)
Keep the useful changes for next Christmas
Before taking the displays apart, photograph them from the normal viewing position—and take a second photograph showing how the additions are attached.
Keep removable clusters together where practical, and label them with their location: “wreath, lower left” or “mantel, centre join”. That makes the useful parts of this year’s arrangement easier to repeat without having to remember exactly where everything went.
With illuminated foliage, leave the electrical system unmodified, keep decorations clear of hot bulbs, and switch lights off before bed or going out. LED lights run cooler than older incandescent bulbs, but still need to be used according to their instructions. (London Fire Brigade)
The most useful addition is the one that solves an identifiable problem: leafy sprays for a visible gap, trailing foliage for a rigid edge, berries for a seasonal change, or better stem support for an arrangement that will not hold its shape. Start there, rather than assuming the whole display needs replacing.
 A warm welcome from The Artificial Flowers Company. We offer artificial flower arrangements, silk flowers, hanging baskets, topiary balls, topiary plants and much more - we hope you find what you're looking for!